Showing posts with label finished. Show all posts

Wednesday, August 19, 2015

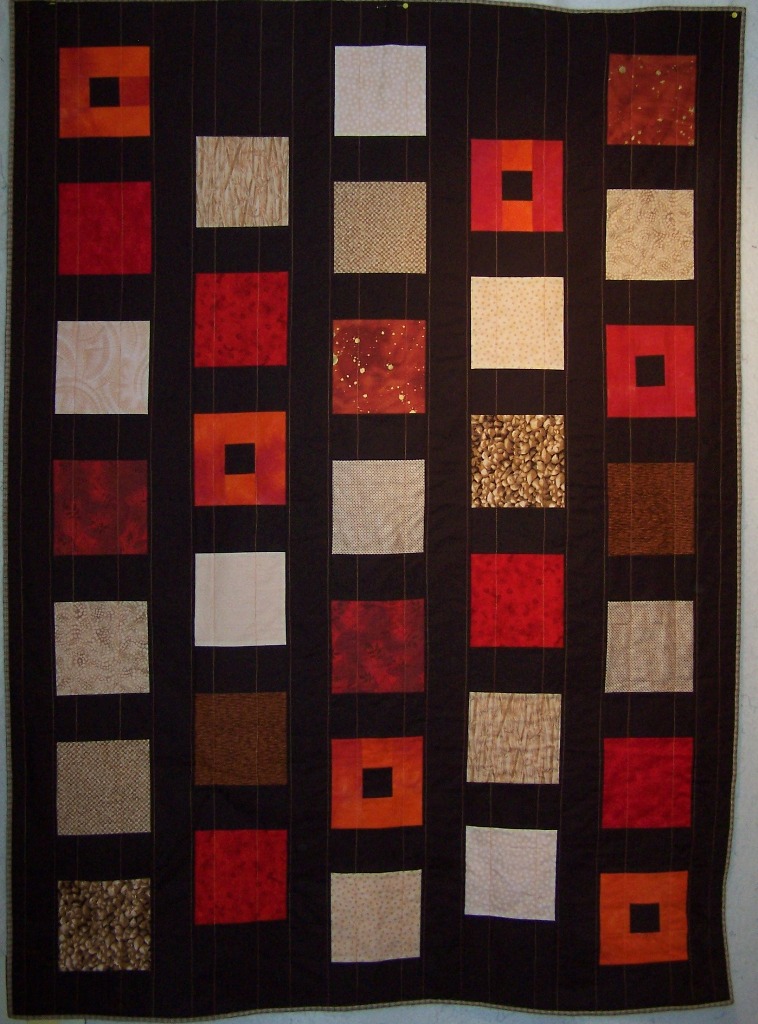
Another Finish

This one was so much faster than the last. It's quite a bit smaller and the quilting is much plainer. I just did a simple jigsaw puzzle design and then striped multicolored fabric for the binding. You can see a close up of the quilting below. Simple lines from top to bottom then side to side.

Feels good to have one less top hanging around.

Sunday, May 3, 2015

...and the Top is Done


I like the way this one looks. I have no idea how I'm going to quilt it, but I really like the way it finally turned out. I didn't want black for the border. I was going to use a light blue around the gray, but I think it's done.

I like the secondary pattern of the stars. It was fun figuring out how to make the borders fit around the hexagons. It's about 67 x 84. It will be big enough for the top of the queen bed in the guest room, but not a whole lot bigger than that.

I just found "Let's Bee Social" on Sew Fresh Quilts and love the blog. She also has a link party, so I've decided to join. If you want to see some more quilts, check here.

I also decided to share on WIP Wednesday on  Freshly Pieced and you can see more quilts here.

Sunday, October 14, 2012

Alphabet Quilt Top

I like it! Now to quilt it. Don't know what I'm going to do, but I'll figure something out. I want to make another one using prints...and I was thinking white for the background, but that just doesn't make sense for a baby quilt.

It was fun to piece the letters. I didn't really plan, just looked at the shapes and made them up as I went along. I will change a few I think...the O, the P and the R for sure. Maybe A and V.

Fun quilt and didn't take too long, but it did make a mess. Fleece for the backing/batting I believe.

I don't know if I'll get this done it time, but if I do it's off for the new baby on the 23rd.

Wednesday, February 8, 2012

One More Done

 Wow, I am being pretty productive early in 2012. This is the  first quilt finished in February, but the fourth one this year, yay!

I really like the colors, the quilting and the design of this quilt. I just like the whole thing. I don't have a recipient yet, but we'll see, we'll see!

Friday, January 27, 2012

Another One Bites the Dust!

... and another one gone and another one gone, another one bites the dust...

I have to admit I'm feeling pretty productive. I have now completed 3 quilts since 1 January. Only 27 days, yippee!

I don't know where this one will go, but it will find a home. I used green leaf fabric, the same type as the rest of the fabrics, for the binding. I used green thread on the background so thought that might work. 

It almost looks like I know what I'm doing when you look on the quilting in the orange zig. It was the last one I did on the quilt, so I was getting pretty good by the end. I started this quilt 10 days ago, I think that's a record. I have some ideas for more variations on this quilt. Not only is it quick, but I like the way it looks.

Here is the label, with a bit of the back showing. I like the whole thing. I have to wash it before it goes anywhere...it still has a bit of a mechanical smell and it is shedding.

Hope someone likes it.

Wonder which number Judy will pick next. I still have to wait 3 days to find out, so I may have to start something before the.

Thursday, January 26, 2012

Quilting is Done

 This looks pretty cool, if I do say so myself. For someone who usually gets out the walking foot and does some kind of straight line design, this feels pretty good.

I still have to trim and bind it. I think I'm going to use a spring green for the binding. That's the color of thread I used in the background zigs.

I used thread that matched the zigs to do the quilting. I decided it was OK if you could see different colored threads on the back.

It's not perfect, but it's done!

...and I think I'm finally giving in. I've been wanting a more portable sewing machine for taking around. My sister has a featherweight that's very cool, but I didn't want to spend $300 for a second machine. I started looking around again online, and found a few small machines, but none of them got reviews that made me think they would last. My current machine is a Bernina 801 Sport. It's the one I bought in about 1988. It was designed to be a machine used in Home Ec classes, so was simple but sturdy. It's all mechanical and I've been able to oil it, clean it and keep it going.

The newer small machines are too flimsy looking for me. A few years ago I spent about $90 on a small machine and it was just crap. Today I was looking at the anniversary edition of the Singer Featherweight. It's about $400 and looks kind of cool, but I want something that sews a straight stitch and does it well.

I looked on ebay for an old featherweight, and there are plenty of them, but they'd have to be shipped, and if they don't work they'd have to be returned, yada, yada, yada.

I finally searched for Singer Featherweight Colorado, and lo and behold on Craig's list there was on listed for $180. I looked at the pictures, it looks good. It's not in pristine condition, it looks like it has been used. I didn't want a collectible, I wanted a machine that will sew, and sew well. I called the person who listed the machine, and he is the one who refurbishes them...I'm going to buy it on Saturday! YAY! It's a 1955, and I was born in 1954, so I think it's new enough for me.

Friday, January 13, 2012

First UFO Done

 Here is the first UFO for 2012 quilted, bound and labeled. It doesn't have a home yet, but it will. The quilting is very simple. Vertical wiggly lines, except on the brown borders and the blue corner squares. The quilting on the brown is in the direction of the border, and the squares are 90 degree lines that go around the corner.

The batting/backing is a yellow fleece, and the binding is kind of a wild black and white print. I'm not sure why I picked it, but it was right at the time.

Yay, one down, 16 to go (if I am going to get them ALL done haha!)

Thursday, July 21, 2011

Stack n Whack 4-patch....done.

 I like it much better finished than I did when I first made the 4-patch blocks. Then it was a bit dull for me, but now...I like it. THe dark green finishes it off without fuss so the blocks really stand out. I have no idea how I'll quilt it...I really have to find someone who doesn't like to piece, but loves to quilt. We'd be a perfect match!

No post for more than a month, then 4 in one day, what is this world coming to?

Jeans "buckets"

I saw this idea on a blog a while ago. Use old jeans legs and make little buckets out of them. These don't have any interfacing, so they're kind of slouchy. I like that. I may try some others and use interfacing to see how they look. I'm going to donate these to the quilt guild's auction in October. Think someone will want to buy them?

Oh, and why oh why do I wait so long to replace the cutting blade on the rotary cutter...it's like magic when it's new!

Sunday, March 27, 2011

More Flimsies, and a Couple of Pillowcases

 Here is the stack n whack Quilt of Valor top. I still need to quilt it and figure out how I'm going to do that...no idea right now. This is for a military person that my friend works with. She lets me know that she needs a top or I as if there is anyone who needs one and I make them. The folks she works with are mostly active duty and are struggling with PTSD, so I am happy to do this. Makes me feel a little more connected to the recipients, even though I don't know who they are. This quilt , this one and this one were all made for her to give away. Oh, so was this one (I almost forgot). The skull, irish chain and hunter quilt were specific requests for specific people, the others are more generic.

 I also finished a top that will go back to the group I quilt with on one Sunday a month.
It's from a pattern called 4 Layer Cake and has many different fabrics. It's not my favorite quilt, but it did go together very quickly. Only two of us showed up last time, so Linda cut this pattern out, and I told her I would be happy to sew it together for the next meeting. It will be sent off to a volunteer long-armer and then given to someone deserving.

I also made two pillowcases for presentation for these two quilts. Very simple, but they work. I really like the "sausage" method  so that there are no exposed seams. There are plenty of tutorials around, the only change I make is that I cut the contrast bit only 1-1/2" wide instead of 2-1/2". Easy to do and the results are great looking.

To see what more people have on their design walls, check Judy's blog.

Saturday, March 12, 2011

Daniel's QOV

Daniel came back home for a couple of weeks of R and R from rehab. His dad wanted a big welcome for him, so let folks know when he would be landing. We decided to go be one of the crowd, and though I wasn't sure I would be able to give the quilt to him directly, I decided to finish it up and bring it.

I made a label and a pillowcase to put it in. The body of the case is fabric I bought that I thought I might use. It's passport stamps from all over the world. I had a bit of the fabric that I used for the postcard blocks on the front of the quilt, so used that for the cuff.

It was pretty cool at the airport. When we got there, there were already about 50 or 60 people there waiting. His family of course, and people from his church. There were about 10 or 15 people who were Marine vets...an HD motorcycle club. People had signs and balloons, and when he got off the elevator everyone clapped.  I hope he felt the love. I gave the quilt to his mom to give to him. I hope he likes it.

Here is a clip of his homecoming (thanks Paula).

Tomorrow I go to work on some more QOVs with a group that meets at the Air Force Academy. This will be the third time I go. It's a small group, but it's good to be doing something.

Saturday, March 5, 2011

Quilts from the Past

This is one of my favorite quilts. I made this about 7 years ago and gave it to a friend. It was a color study. I dyed the fabric complementary colors (yellow-green and red-violet) then made this quilt. I quilted the maze in the middle with a satin stitch. I forgot how much I liked it


This was made for the same friend, from a kit with some added fabrics. They both hang in her office. The one above is probably about 30 by 30 and the one at the right is a twin size.

Sunday, February 20, 2011

Another one Done

I find it every interesting that working on getting a UFO finished really motivates me to sew a lot more. Even when I don't like the one I'm working on. I hope this one gets to the party on time. I'll send it out tomorrow. I thought I'd already had it quilted...oops, so got it done today.I finished the top sometime last year. I can't find the post now, but it was in the middle of the year. I like the way these types of labels look. Easy to make and personal.

Saturday, February 19, 2011

Tah and Dah! UFO #10

Do you see that? Do you see that top over there? Do you know how many pieces that top has in it? Neither do I, but it's a LOT.

The best thing about it, the VERY best thing about it? IT IS DONE.

I can't say that I like it, but it is finished. You know tha saying, finished is better than perfect? In this case, finished is better than anything. I am going to put some sort of border around the top, probably a black border and then I can really call it done.

Do you see how many capital letters I have in this post? That is because there is no other way to show how delighted I am that I won't have to do any more work on this. There are so many freaking intersections that the only way I could possible quilt it across somehow. I'll figure it out so it can be out of my house.

It's 46 x 57, so two-thousand six-hundred and twenty-two inches of DONE.    YIPPEE!

Friday, December 10, 2010

Fair and Square is done-and Design Wall Monday

 I ended up just doing straight line quilting. The backing/batting is fleece, so it doesn't need to have the quilting too close together.

 The label idea came from one of the blogs I read. Print out whatever you want on the label in a font you like. Find a fabric that is thin enough to see through, then use a fabric pen and trace the printed information. Fold over and sew the ends in, then sew it into the binding. It's easy, I think it looks nice and I like the way it fits on the quilt.  Not too intrusive.  The binding was some homespun I had, no idea where I got it though. This gets sent today----Yay!

To see what others are doing, check out Judy's blog. 

Friday, September 3, 2010

Another one Done

It's quiletd, bound and labeled. I'm happy it's done. It doesn't have a recipient yet, but I'll figure someone out.I saw a label on someone's blog that I liked to I did a similar thing. I printed out what I wanted to say on a strip of fabric, traced it with a fabric pen, then enclosed the ends by sewing them together. Then, as I finished sewing on the binding, I included it. It's a little flap of fabric on the back of the quilt. It's soft enough not to be bothersome, but obvious enough that the quilt will stay labeled.
I'm going to start quilting the next one soon. It will have a fleece backing as well. It is the butterfly blooms top that I finished in June of 2009. You can see the whole top by clicking on the link above. That's one of the reasons I like blogging. I would have no idea how long ago I finished that one, except I've blogged about it.

Thursday, May 20, 2010

9-Patch Swap...Done!

I woke up yesterday morning and knew how to finish quilting this quilt. The top has been done since October 13, so it's waited 7 months to be finished. I had most of it quilted and didn't know what to do in the 9-patches. I ended up just quilting around the center square. It's simple and I like the way it looks. Now to send this off to my niece. I hope she likes it.

I'm going to try to get a couple of charity quilts quilted, then the QOV top quilted. If I am diligent I may have all three done by next week.

Wish me luck.

Thursday, March 11, 2010

Hunter's Log Cabin-Top Done

The top is done, and everything fit together well. I wasn't sure I measured the center panel correctly to fit inside the log cabin blocks, but all went together well. I've never used plaids before in a quilt, but I've seen some quilts that I liked, and some that I couldn't look at because the plaid wasn't straight in the blocks. I cut the plain for the border so that it was the width of a repeat, so when I pieced the border it wouldn't be noticeable. I was successful (mostly) in matching the plaid so there is no obvious seam.

I bought some fleece that I can use for the backing, but I don't know if I want to use it, or do a typical quilt sandwich and quilt the top.

I'll have to live with it for a bit until I can figure that out. Next...quilting some more of the tops I already have done.

This must be my design wall post. I sewed a blouse this weekend (I'm going to Hawai'i!), but the buttonholes aren't done yet. I also made a quick charity quilt.

If you want to see what others have on their design walls, check out Judy's blog.

Friday, January 29, 2010

Shadow Stars Done

Here is the label I ended up making for the zip-it quilt. It was a commission from my niece for her sister. It is very soft and snuggly.

Here is the next top. I ended up quilting 1/4 inch around the stars and the center square of each star. They're not exactly perfect, but they'll do. I have a soft yellow fleece for the backing.

You can see the quilting here a bit better. The binding is the same peachy-pink as the interior backgrounds. I sewed it to the front, then used a back and forth curve to sew it down. I don't know who it's for yet, but I'll figure it out.

Next...not sure yet, I think maybe a new top as a reward for finishing one more.


Monday, January 18, 2010

Quilting is done


Well, the top is quilted. I just need to buy some fabric for the binding. I don't have enough of the dark brown, and though I do have different greens, I think I want the binding to just disappear into the quilt and not be a statement.

I didn't have any trouble at all with the Minkee, but I did a couple of things that probably made it simpler. I had read some else's blog. She said that she quilted making sure that she didn't cross lines anywhere. I also noted the non-stretch direction and only quilted that direction. I quilted about every two inches and it came out flat and didn't stretch at all. I also made sure I sewed only one direction. In my case from the light end to the dark end all the way across the quilt. It was getting kind of bulky under the harp of the sewing machine, so I decided to try sewing from the other direction. The Minkee shifted some and though the ripples weren't horrible, I decided to take that line of stitching out and continue in just one direction.

I would use it again, but with the same constraints. I pinned about every 4 inches, and made sure that I had smoothed the two fabrics (I didn't use a batting, just the quilt top and the Minkee) only along the non-stretch direction--the length of the fabric as it came off the bolt.


LinkWithin

Related Posts Plugin for WordPress, Blogger...