Tuesday, December 20, 2011

2012 UFO list

OK, I have to decide what I want on my list for this year. I'm going take a number of them from last year, and few new ones. Let's see...

1. The one block wonder quilt, it needs to be sandwiched and quilted...the top is already done.

2. The brights round-robin quilt. It is a wall hanging and the top is done.

3. The jewel box quilt...needs to  manicured and then sandwiched and quilted.

4. The stack n whack undersea quilt.

5. The Zippy Strippy stack n whack

6. Then there's this one..the Big Ezy. I like it and it's done. The block that shows as out of place here, is fixed. Didn't notice it but readers did, so I fixed it.

7. The dresden rainbow plates. Top is done, needs to be quilted.

8. This stack n whack 4 patch.

9. This one. I think I might add a border before I quilt it again. This is one I quilted with fleece, and then the fleece melted in the drier, so I took it off...unquilted it if you will.

10. this one is even pinned, just needs to be quilted (come on, Mary...get it together! :^)

11. This one needs about 1 hour more of work...I will get it done...I will!

12. the picture above is going to be Jack's Chain and the one to the right is Judy's peaches and dreams. I don't know if I'll get both tops done, but I like them both and at the moment I'm motivated.

Sunday, December 18, 2011

UFO Report for 2011


So, I have four quilts done that weren't before, that's better than a poke in the eye with a sharp stick. I also made a very involved wall hanging for our pastor, from nothing to done in 2 1/2 months. I made 3 quilts of valor from start to finish, and tops, tops, tops, 7 new tops,4 finished , not a good ratio. I also made 3 cord baskets, a professional tote and upholstered a couch. Below is what happened with the UFOs I listed for Judy Laquidara's UFO challenge. Some are going back on the list for next year.


1. Disappearing 9-patch swap quilt-done quilted and will be gifted this season. (one down)

2. One block wonder--this one still needs to be sandwiched and quilted. Didn't even touch it. It was sometime after June, I don't remember when, and that's when I fell off the wagon!

3.Brights round robin quilt--also waiting to be sandwiched and quilted. Also didn't touch it, though I know where it is!

4. Done, done done. I still have this in the closet, it may be gifted before the end of the year, too. Just don't know who to.

5. Not done, not touched. It needs to be pressed and all the threads trimmed from the back. I made this and used it as a duvet cover. Washed it once and decided it would fall apart if I used it again. I love it, and just need to do some manicuring on it, then sandwich and quilt.

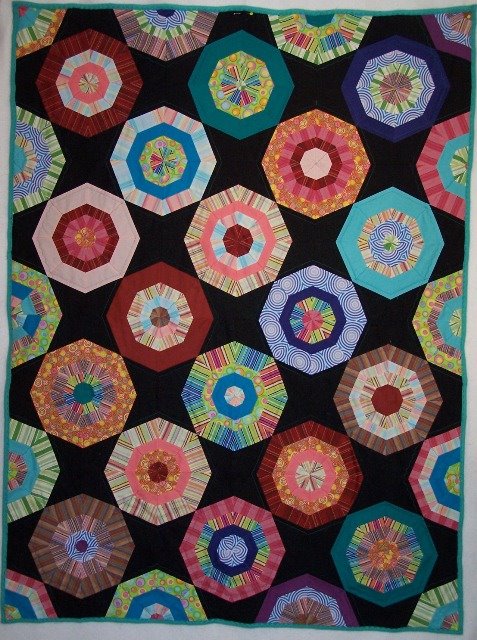
6.Done, finished, gifted. I know when I give things away, they should be without strings, but I didn't even get a thank you for this. Ah well, I love it and enjoyed making it.

7. Another one I didn't touch. It only needed some kind of border, then to be sandwiched and quilted. It's just wall hanging size, so not too difficult.

8.Not touched. It was another that was towards the end of the year (well after June at least). It's wall hanging size and I need to decide what to do with it. I think it needs some kind of applique, but not too much. I think this will go on the list for next year. I could get pretty creative.

9. I was about done, and ready to finish it...just the borders to be done. I showed it to the recipient, and she asked if I could make it about 8 inches wider on each side so she could use it as a bed cover. That stumped me, so I've been avoiding it. I decided I will finish it as is, and she can buy something to put under it, but I just can't figure out how to make it wider without going insane.

10. I finished this and hated it (because of the pain in the butt it was to finish it), but I use it almost every day now when sitting at my computer. It's about the perfect size for putting over my lap to keep my legs warm, and because of all the seams it is warm!


11.I did end up getting the borders on this one, but now it needs to be sandwiched and quilted. I like it!

12. I didn't touch this one either. Probably going on the list for next year.


Tuesday, November 22, 2011

Design Wall-Couch is done

The couch is done. I like the way it looks and when we have the covers on the chairs I'll post of pic of how I dye them. When I look at this one compared to the current couch, it looks like a dolls couch, but we're going to get a small table and the two chairs are small as well. The room will look finished but not overfull. Covering this wasn't terribly hard. If you can sew curves at all, you can do it. The only places I had any trouble were at the corners of the arms and the back a bit. I think the secret was pinning the fabric to the pieces so that it was taut and fit, then measuring a half inch seam allowance. I then unpinned and just sewed the parts together with a half inch seam allowance and when I put it on the couch part it fit. Of course it's not perfect, but it is good enough for me!

If you decide you might want to try upholstery, I say, go for it...you can do it!!

To see more design walls, check out Judy's blog.

Sunday, November 20, 2011

Design Wall Monday-November 21

The quilt is all done. I decided that the sky needed a bit of quilting so added the knots there. It was presented last Wednesday and is being signed by parishoners on the back. The binding is dark blue, and very thin. I hand stitched it down because it is so thin. The shape of the wall quilt isn't really weird like this.
I have been working on this loveseat today. We have a small living room, and have had a large-ish couch in there that just took up too much room. We have been looking for something else and when we went to Ikea on Friday evening to buy chairs (one in red one in gray with covers that I can dye) we found the love-seat. I've had fabric for a while to cover the other larger couch, but never got to it. Too complicated. But when I saw how this loveseat is put together I decided I could do it.

Here are the parts and the fabric. I made slips for the arms and one larger piece to staple over the seat. I was going to piece it but figured out that it would be much easier to just staple it. I still have to cover the back, and that means piecing, but I don't think it will take too long.
Here it is sorta stacked together to look like a loveseat. It's just the parts, but I like it. Not really a design wall, but it is sewing.

If you want to see what folks have on their design walls, check out Judy's blog

Sunday, November 13, 2011

Design Wall-The Quilted Sky

 The sky is a little poofy, and I didn't want to quilt it a lot because I knew it wouldn't be smooth (I'm just not that good). I was looking at it, and knew that it needed something, and then I thought of more knots, so I did. You can see it's not great, but I think it will be OK. Sometimes I look at quilting and think it just looks awful, and other people look and they don't see it, so I'm going to assume this will be OK.

The quilting in the sky is completed on the right side, but just marked and pinned on the left. I have to say I transferred the design by marking the design with pin holes, then rubbing chalk across the paper. Then I took a marking pencil and darkened the lines so I could see them to quilt. They kind of rubbed off as I was quilting (yay) and I used a white eraser to complete the job. I saw this used when I watched a video about the Tentmakers of Cairo a fascinating look at the work they do, with some techniques thrown in. If I hadn't seen that video last week, I would have struggled to figure out how to add the design...so yay surfing!

If you want to see what other design walls have on them, check out Judy's blog.

Sunday, November 6, 2011

Tree of Life top is done

 I know it doesn't look much different, but all of the leaves are fused on and each one has "veins" sewn down. I knew they would have to be attached and did the first one adding veins. I liked it OK, but wanted to see if I could free motion around the edge. Nope.

There are 57 leaves (if I counted right) and it only took about 1 1/2 hours to do them all. I'm not very fast but I am thorough.

The borders are on, and it is ready to be sandwiched and quilted. I think I've decided I'm going to use clear polyester thread. That way the back can be used for the church members to sign before it is presented to Fr. Paul.

In the picture of the leaves you can see the veins I've sewn in to attach them to the quilt top more securely. I know they might detach around the edges, but I figure that will just give the quilt more dimension.

To see what more folks are doing, check out Judy's blog. 

Sunday, October 30, 2011

Almost There-Design Wall Monday

I changed out the corner on the border. I tried the knot in the original design and it was too heavy. I've ironed on about half of the leaves. I used misty fuse for the letters and the edges frayed a bit...I'm going with it. The leaves are so small that I'm using stitch witchery. A bit more there, there so I don't think it will fray. I'm cutting the leaves by hand, then bonding them. When they're all done I'll stitch around each one to make sure it doesn't fall off.

I love the darker green circle framing the tree. I did it in four sections, and it still needs to be stitched down. I'm doing a top stitch near the edge. I used freezer paper and pressed the round edge under, then took off the paper and pressed with best press. It's all pinned and waiting.

The borders aren't sewn on yet. I'm going to wait till I have the leaves all one. They'll be the last thing sewn. I don't want the letters to fray too much. I might see if I can find something that will stop the fraying. I think fray check will make it shiny, and I don't want that. Do any of you know what I might use? I am really pleased with how this is turning out!

If you want to see more design walls, check out Judy's blog.

Wednesday, October 26, 2011

Dissapointment

Sometimes Mother Nature disappoints. I was hoping that wouldn't be possible to go to work this morning, but we only had about 2-3 inches and tonight, not a whole lot more, maybe 4 inches. I guess we can hope for more tonight, but I'm thinking we're going to be disappointed again. I guess I'll have to wait for another day.

Tuesday, October 25, 2011

I may get more work done

Gotta have a picture, so here is one from Weather Bug
We have a forecast that includes 4-8 inches of snow tonight and another 6-10 inches tomorrow. The first real storm of the season.  If we end up with even 2-3 inches tonight, we probably won't go "down the hill". That's from Woodland Park to Colorado Springs, about a 2,500 foot drop in elevation. It's possible that if it continues to snow during the day, we won't be able to get home, and I'd rather be stranded at home than at work. Soooo, if I stay home tomorrow I'll be able to get more sewing done on the tree of life wall hanging, and that will be good!

Sunday, October 23, 2011

Design Wall Monday-October 23

 Here is one of the knots. Thought I'd share just so you can see what it looks like up close...

...here are three of the borders done. I've decided that I am going to put the leaves in, and put the green circle border around the tree.

The words are raw edge applique, and I'm going to put the leaves on using the same technique.

I'm really liking the way this one is turning out...lots of work, but I think it's worth it.

To see more design walls, check Judy's blog.

Tree of Life Progress

 Here is the drawing...
...above is what I have done so far. Now I can't decide if I want the circle of darker green and the leaves. I think the circle really frames the tree, so that will go in, but the leaves are still a question. The fabric for the leaves and the frame is not a solid, it is a darker green batik, you can see it to the left.  Do you think I should make it more solid?

I decided to use a stop watch to get some idea of how long the knots take to pin and sew. I wasn't exact (because I forgot a couple of times to start or stop it), but the one knot next to "be" took approximately 1 1/2 hours to pin and sew. I guess there's a lot of time in this one.

All of the knot work in the branches and roots are sewn now. The letters are fused and top stitched down. That was pretty easy. I'm going to try to get more of the knots done. I think I'll do the top ones next. They're smaller than the others because the letters are larger.

Sunday, October 16, 2011

Design Wall Monday

 I've got the top bit sewn down along one edge. The roots are still just pinned. I need to add leaves to the to between some of the limbs. I'm also going to add a darker green in a circle around the tree. The tree is about 24" across. I'm also going to add borders with "The Lord be with you" the way the priest starts prayers...seemed appropriated.

It took a long time to pin, and a long time to sew what I've sewn. I don't think it's going to take as long as I thought.

I want to have it done by early November so I can quilt it. Don't know what I'm going to do for the quilting.

If you want to see more design walls, check out Judy's blog.

I decided I should add a bit more information about this. I am making the quilt for the pastor of my church. He is retiring after 11 1/2 years with us. He made a trip to England, including Iona, and really enjoyed the Celtic spirituality of Iona. My husband works for the church, and has a trinity knot quilt on his wall (that I made) that the pastor really liked. I decided since he is retiring to use the tree of life, and did a google image search using celtic and tree of life. This is actually based on a design for a tattoo.

I used Microsoft Paint to make up the design for the whole top (to the left). The words "The Lord be with You" are included because that is how he starts many prayers, and gets everyone's attention when we're in a group.

When I was finished with the design I found a free poster program online and enlarged the whole thing to about 36" square. I then traced it because it was quite pixelated and used the traced version to mark the knots and cut out the trunk.

 I'm going to quilt it with a white/light backing so it can be signed by the parishoners on the back. The pastor is leaving December 4, so I gotta hurry!

Saturday, October 15, 2011

Whew!

 I just spent a good part of the day making the bias strips and pinning them to the design. It took a loooong time.

I bought some applique pins this morning, and used about 2/3 of the 350 I bought.

I wonder how hard it is going to be to sew all this down. I am going to use the machine. I'm a skilled top-stitcher, but there is an awful lot of bias tape to sew down. I like the way it looks.

The bottom edge isn't reddish, that's just the indoor lighting.

When I've sewed it all down I still need to add the leaves.

Saturday, October 8, 2011

The View

 The first snow of the season. It's been a long Fall. We usually have snow before October, but we're getting it now.

Friday, October 7, 2011

Some Shopping and Jelly Roll Race Done

We got an Ikea in Colorado this summer. I have many fond feelings for Ikea. I like a lot of their furniture, they have fun lighting options, their food is pretty good and... I went to Ikea first in 1987 on my honeymoon in Germany. My husband's mom is from a small town near Heidelberg, Wiesloch, and not far from there is and Ikea in Waldorf. 

I thought it was wonderfully different then. They have the same type of layout today that they had in 1987. You wander through room set ups, see all kinds of ways you can use their products, then you go downstairs and shop for tschokes and kitchen stuff. I discovered the fabric section before the Ikea was here in Colorado. I have family in California, and when visiting a couple of times, I went to Ikea there, and found some fabrics. I haven't done anything with it yet, but I like it.

Looking at the fabric above, I think I'm going to make shopping bags from the vegetable fabric. The button fabric is actually pillow covers. The bright abstract fabric is a kind of heavy twill, so I might end up making heavy duty shopping bags from it. The black and white prints I think I am going to dye. It would be fun to add color to them. The vehicle print is going to be kid quilts. Either a whole cloth quilt, a backing, or maybe I'll cut it apart and use the different vehicles in different blocks. The green dotted fabric is actually the duvet cover to the right. I love the graduated sizes of dots. It's 100% cotton and when I figured out the cost per yard, it's only about $2. I don't know if I'll use it for a quilt backing, or what yet, but I own it now and can do what I want when I figure it out. 

My eyes aren't as good as they used to be, and sewing can be tiring. I saw this little clip on lamp (at Ikea of course) and thought it might work. It was about $15. It's an LED with a magnifier that makes the width of the beam much better. I was thinking of buying one of those tiny LEDs that you can stick on your machine, but I couldn't bring myself to spend $30. It does exactly what I wanted and should last me a very long time.

This quilt was quick and I think it's a nice one to brighten up someone's day. It is a jelly roll quilt, and I backed it with fleece. The binding is made from some fabric I bought on sale a while ago. 

I bought the yellow fleece previously to back one of the tops I have completed. I don't remember which one, so I used it for this one. I still have about 15 tops that need to be quilted, and I was able to use the same fleece for another quilt, so instead of the one I originally planned (whatever that one was) I was able to finish two tops with this one piece.


The colors on the first picture are a bit more accurate. It is a fun, bright quilt.

Sunday, October 2, 2011

Design Wall--Working Again


I'm finally quilting some of the tops I have. In one spot, I've counted 17, oops (and that's not all of them). I already have a bunch of fleece to finish them off. This one will be a charity quilt when it's done.

The pictures below show the "after" of cleaning up my sewing room. I have some "before" pictures but they're on the other computer and I can't get to it right now. Believe me, you'll be impressed when you see them. It was so awful I wasn't sewing at all. My husband was gone for about 2 weeks, so I took the opportunity to move all of the totes out of the room and go through them. Get rid of stuff, move other stuff into more accessible places and make the room easier to work in. One thing I did was move the computer desk out. Now when I'm sewing and my mind wanders I have to walk down the hall about 30 feet to get to it. At least I'm getting some walking in :^)

The quilt on the design wall below is one I've been waiting to put borders on for a while. I got them done, now I think it's going to be the next top I quilt. By the way, it is NOT one of the 17 tops I have.

If you would like to see more design walls, check out Judy's blog.
This corner isn't changed much. I cleaned up some the piles, but now I've added new ones!

Much cleaner. I've turned the table, and the sewing machines that were catching all the extra junk are now holding up my ironing station.

The two sewing machines are under this pressing station. I made it 3 x 5 feet, so plenty big. I piled some stuff on it that will be going away next week. The green "fabric" in the center front is a duvet from Ikea, loved the fabric, and when I figured the price per  yard, it was only about $2...a deal.

The closet used to have plastic containers in the bottom part. I stuffed junk in there and never thought of it again. This way, I'll at least be able to see it. I know it doesn't look too organized, but it it is.

LinkWithin

Related Posts Plugin for WordPress, Blogger...