Monday, June 29, 2009

What's on My Design Wall 6-29


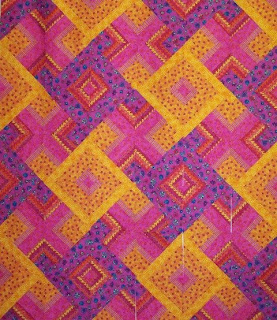
This week I have something to show. I started this about a week ago. Haven't been working on it solid, but have got the top two sections sewn together. It's a Hidden Wells pattern, so all the outside edges of the blocks are bias. I made sure I used plenty of Best Press to keep them relatively solid. The blocks end up 8 inches finished, so this part will be 48 x 56. I'm going to add a couple of borders once the top is all together. I don't have a recipient for this one yet, but I'll figure out who should get it eventually. Maybe it will end up another baby quilt. There aren't any if the offing that I know of, but I'm sure someone, somewhere that I know will have a baby soon.

bluesignaturesmall

Sunday, June 28, 2009

Hidden Wells


Here is the layout I'm going to use. I don't know what color I'll use for the border, probably a purple.

bluesignaturesmall

Friday, June 26, 2009

Coffee Bag Bag


We were in Hawaii last year in March. We visited the Greenwell Coffee Farms (even though we don't drink coffee) to take a tour. They had these unused coffee bags for sale and also some totes already made from the bags. I think the totes were about $15, and the bags were only about $5. Joe really like the totes, so I bought a bag to make one. I finally got around to it today. I made it much more difficult than it had to be. I kept making silly mistakes, so there is a lot of un-sewing going on in this one. I finally finished it (just).

The lining is fabric I bought to make other totes...since there is a bit of green on the coffee bag, I decided to use the green fabric I had. I think it turned out well, and I think Joe will like it.


bluesignaturesmall

Monday, June 22, 2009

Hidden Wells-Mock-up

Here is what I think I'm going to do with the strips I have made. I don't know about the color for sure, but I think this might work. I will only be able to make 42 small blocks instead of the 48 that are needed here (unless I can tease out one more strip) so it might be slightly different than this one.

Hmmm, now that I've looked at this one, I realize I can't do it. There are twice as many of the purple blocks as the yellow. I'll have to rework it and see what it might look like. Ah, well. It's late and I'm to bed. (That tells you what late is for me, it's 9:30, ha!)

bluesignaturesmall

No Success


Because I am who I am...

I am trying to change the pattern from Eleanor Burns' quilt in a day Delectable Mountains. I am not being successful.

I am stopping, putting this away and finding something else to work on. Don't know what yet but I have plenty to choose from. I've got it--here it is.


bluesignaturesmall

Sunday, June 21, 2009

Quilt Tote

Here is the finished tote. It's pretty big, about 25 inches wide and 22 tall. The bottom is 8 inches wide, so it will be able to hold a large size quilt pretty easily. It was very easy to make though I had to make some adjustments because of the width of fabric I had left after making two shopping totes from the panel.

I lined the inside with the blue fabric, and have a 5/8 inch dowel that I cut in half for the handles. I have to either sew the ends of the casing for the handle closed or use some other kind of less permanent closure because the dowels will fall out every time I put the thing down.

Next...I think it's time to quilt something again.


bluesignaturesmall

Friday, June 19, 2009

Paper Piecing...I hate it

Here is a block I made from this project. It was completed sometime before 2003. I don't think I used paper piecing, but I may have. The bits don't even match. Yuck!


There is a project I have all the fabric for...it's set aside with the pattern. I really like the colors, so I thought I would bring it out again and see about working on it. I read a bunch of blogs, one jovaliquilts mentioned a class by Cynthia England and her paper pieceing technique. I looked at the website and viewed a couple of videos on her technique. It looked doable to me, so I decided to try it with the pattern I have waiting to be made. No go. I probably just need to practice so I can do a good job, but the trouble it takes to do paper piecing (for me) is not worth it. The quilts made by Cynthia England are amazing, and many paper piecing quilts I have seen are amazing, but I just don't have the gumption to do it myself...at least not without someone working with me.

Maybe if I took a class I could do it. I've pieced a couple of things through paper and hated taking off the paper afterwards. All those little bits that get caught in the seams. And then I've tried a couple of different freezer paper methods (this last one uses freezer paper) but didn't have much success there either.

So, I'm making some shopping totes instead. Instant gratification! I bought the striped fabric at Walmart. It is actually curtain panels. When I figured out the cost per yard it is only $4 per yard and I REALLY like it. The blue is from my stash...long ago. It is a polyester, so I don't want to use it in a quilt or on a back, but it will be great for lining for the totes. The striped fabric is a twill, a nice weight for shopping totes and together they make me happy.


bluesignaturesmall

Wednesday, June 17, 2009

Headboard Done!

Here it is, back where it belongs. The green of the background fabric is a bit different than the wall, but I think I will get used to it (I know I will) after a time. I now have to do something with the rest of the wall above the headboard. For some reason it looks more bare than it did before I began this project!

bluesignaturesmall

Tuesday, June 16, 2009

Headboard Progress

head board

Here is the progress so far. It is very difficult to get a picture that has color even close to what I see in person. I still have to figure out what I am going to do on the back. I think I will do what I did last time, get some knit fabric and attach it to complete the “envelope”, but make it a bit small so it will pull the cover taut.

signature

Monday, June 15, 2009

What’s on My Design Wall 6-15

empty dw Pretty boring, just a bunch of black thread from the butterfly blooms top that I haven’t cleaned off yet. The next project is a cover for the headboard. It shouldn’t take too long. I’m keeping it simple because the duvet cover is pretty complex.

Here are the fabrics I found to use in it. I like all of them, and they go well in the room. As I make some progress I’ll post some pictures.headboard fabric


Here are the blocks. Now I just have to make the sashing that goes between and around.

signature

Sunday, June 14, 2009

Partly Done

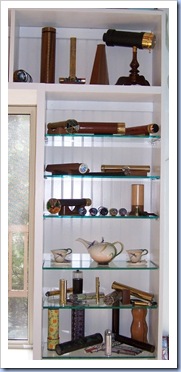
kaleidos I just couldn’t wait till I was all finished to get my kaleidoscopes out of the boxes. They come from a more prosperous time. I had such fun unwrapping each one, looking through it and deciding which were my favorites. I also put out my dragonfly teapot and cups. They are so delicate, I don’t know I’ll ever use them, but they are beautiful.

teapotThe work was worth it—even though I’m not done. I’ll get to the rest tomorrow.

I also bought some different nightstands. I decided to just go for it.  The color of the wall behind the nightstand is just about right. It is a bit darker than the color of the other walls in the room. I don’t have any drawer pulls on yet. The ones that came with the nightstands were BORING, so I’m going to find some others that I like better. nightstand

signature

Opinions Please

Currently I have a black padded headboard. I made it for a previous duvet cover. Below are a couple of mock-ups of possible headboards. Could you please let me know which  you think is better with the current duvet cover? headboard mock ups

If you remember the walls are a bit darker than the green background fabric I show above. As a reminder, here is the duvet cover again with the distracting cluttered night tables removed.

duvet cover1

Any help would be appreciated.

signature

Friday, June 12, 2009

It’s not Midnight Yet

100_5531100_5530100_5532


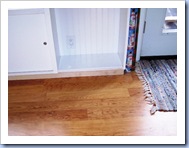
Yay me! All of the face molding is on…well except one piece I overlooked (it’s in the photo below). I saw it after I had drained the compressor and put the brad nailer away, so it will have to wait till tomorrow. I had one piece of molding that was thinner than the others. We cut it ourselves (well Joe did) from lumber, much cheaper than buying molding. Anyway, one piece was thinner, so I figured out I wouldn’t need it and didn’t put the first coat of paint on it. I was wrong. So you can see in the picture in the upper left—wood colored molding.

Tomorrow nail the last piece in place, put caulk in all the spaces and then paint, ugh.

100_5533

No Kaleena, I’m not even close to having the house finished.

signature

Some Progress

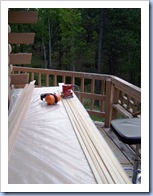
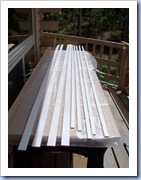
I’ve sanded the molding that will be put on the front of the built in. I’ve also got the first coat of paint on them. 100_5526

100_5528


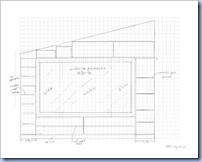
I have to figure out what order to install the molding—it’s a bit of a puzzle. Here is the diagram I used to design and build the built in, I’m going to use it to do a “piecing diagram” for the front moldings.bookcase sm

signature


Work Today

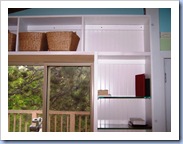
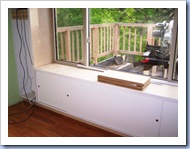
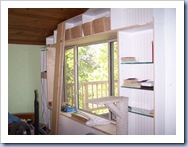
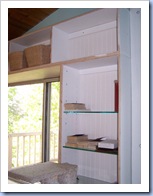
I am going to be working on the built in today, trying to finish the front moldings and painting. I’m blogging about it early, so I can get some work done. Here is what it looks like now…

built in1 before built in 2 before

 built in 3 before I plan to show some progress before the end of the day (that means midnight you know!)

signature

Thursday, June 11, 2009

Butterfly Blooms Top Done

Here is the top with all the borders (finally). It's 96 x 76 and I have no idea how I'm going to quilt it yet, but I'll figure it out. The design wall isn't tall enough or wide enough to get all of the top in. I'll have to figure out where I might put bigger quilts to photograph them. I couldn't get a good picture of the duvet top either.

bluesignaturesmall

LinkWithin

Related Posts Plugin for WordPress, Blogger...