Showing posts with label work in progress. Show all posts

Thursday, June 18, 2015

Almost There, and Some Advice

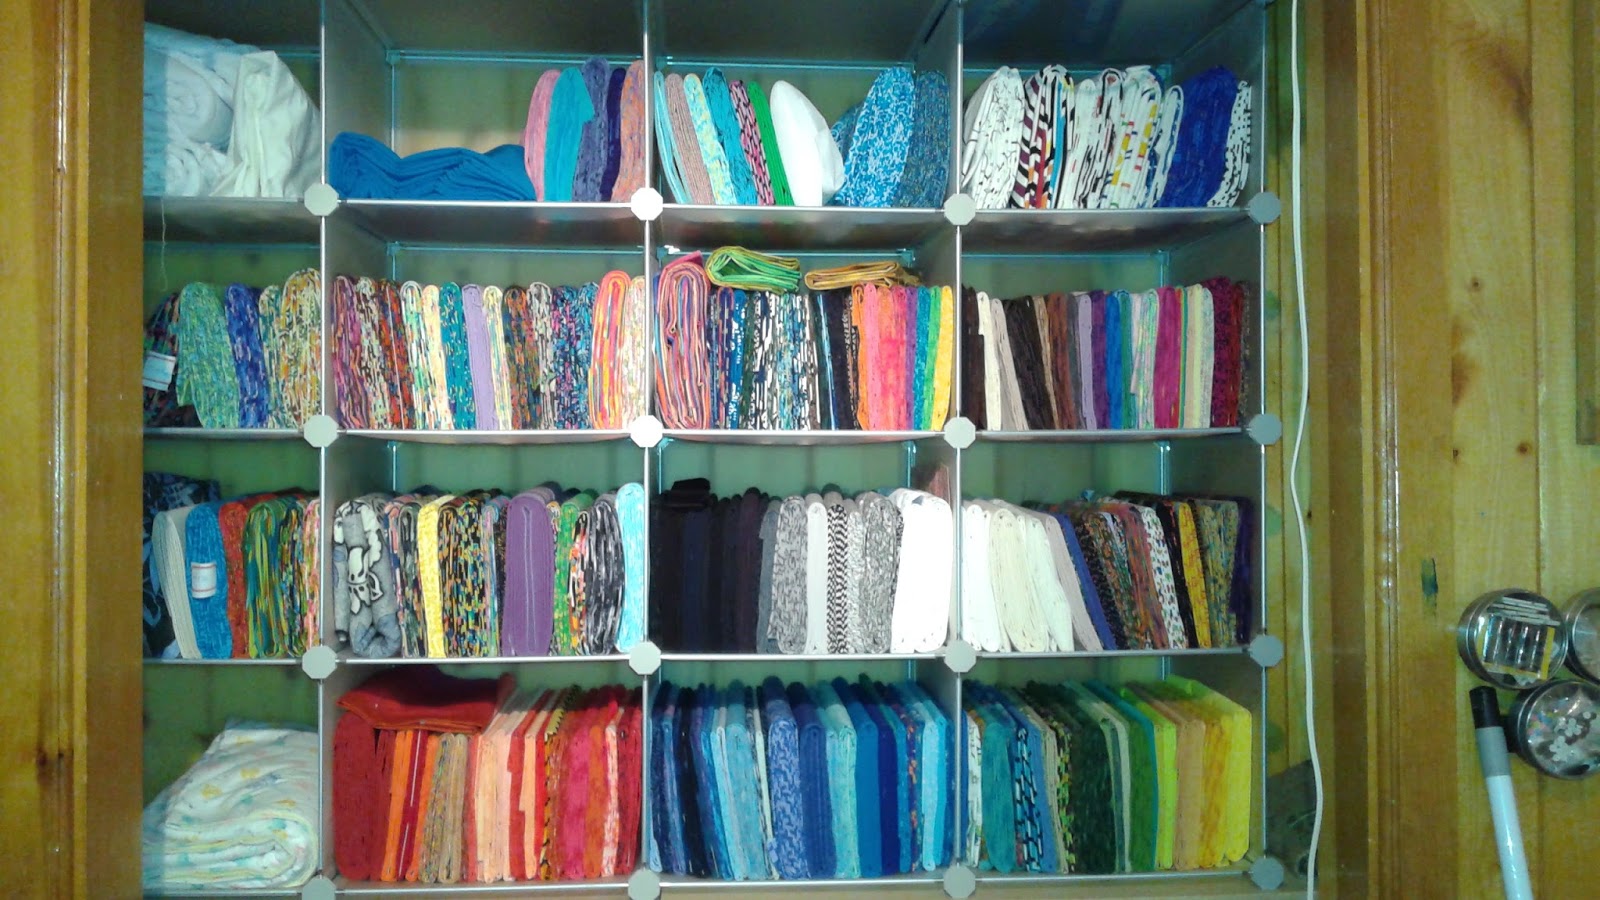
Here is the fabric closet now. I took this last night, then found more fabric (surprise) that needed to be wound into mini-bolts. I have to let you know, I have bought and lost solid black fabric a couple of times, but good news, now it's found!. One piece was about 8 yards (what for you ask, I have no idea!) The last one I found was only about 3 yards. I have plenty of black fabric. Good thing I like to use it.

And now for some advice. The last time I  organized I put things away so that they would be organized. The little set of drawers you see has a sister; both of them filled with delightful items I would keep together to work on any day now. I then put the two of them very safely in the closet in their own little space on the floor in the corner.

Yesterday, they were brought back into the light. I found the wonderful treasures I had stored. I guess I wanted a time capsule, not an easily accessible storage place. So my advice, put things where you can get to them easily and where you can see them, unless of course you are constructing a time capsule.

I must have been because I also unearthed this kit. I looked at it and couldn't figure out where or when I got it.
Then I looked at the tag. I bought this when I went with my sister to the Sister's Quilt show in, wait for it....2008. So the time capsule worked, it has reminded me of events and wonderful times from long ago!

Update: I found this. The closet just outside my sewing room. I knew there was fabric in it, I'm the one who put it there. However I think my mind has been ignoring it.

The large bin toward the top has fleece for backings, so that one goes back. The small one on top is completed quilts, so they get moved. The bottom one has clothing fabric and patterns. You'll be surprised to hear that I have aged it long enough, and it is ready to be shared (with a charity shop), at least most of it.

I think I should stop looking. I'm tired of fabric! I don't want to organize anymore. I want to quilt.

Oh one more! These blocks were in one of the time capsules drawers. I remember that I didn't like them when I finished them. Now they're OK, I guess absence does make the heart grow fonder. I have fleece for the backing, so quick baby quilt. You'll be surprised to know there are babies going to be born in my world.

Onward and upward. Back to work.

Friday, June 12, 2015

Squirrel(s)

 Because, as my sister said last night, I see a lot of squirrels while doing some long term projects I have to replace this one ugly section of fabric. I have been meaning to do it for a while, but I guess I just didn't need the distraction enough till now. These fabrics are all dragonflies I've collected. I put in the orangey-red one and I just HATE it.
So finally I am going to replace it with the blue you see here. (sorry for the crappy pictures, my husband is using my camera so I'm using my phone.) I don't LOVE this quilt, but it's OK. I might like it better once it is done and quilted. Maybe this will be the first one I quilt with the Bailey's Home Quilter I got.


And I'm done. I replaced the whole zig-zag row. I feel MUCH better now.

Whew.

Sunday, May 17, 2015

I tried...but

I don't like paper piecing, but I thought I'd give it a try. I have put the wall hanging pieces in a box. Maybe I'll try again some time later. I tried about 4 times to get started, but I had to take it apart 3 times and decided to put it aside.

I have made the back for this quilt. I added borders, and then decided to piece the back using the bits and pieces I had left over from making the top.

This is what it looks like. It took a long time, but I think it will be fun. I'm going to try using spray basting this time to see how it works. I took Small Machine, Bit Quilts, Better Results on Craftsy and that is how the teacher, Ann Petersen, bastes her quilts.

We'll see how it works.

Monday, March 9, 2015

Design Wall-March 9

 I'm very pleased with the progress. I have most of these blocks together and even though it is on its side (posting sideways again for some reason) I have figured out the way to put these together.

I still have to add all of the green around the edges to make the top rectangular, but I like how it's looking.

The process was painful, but I finally got it. YAY me. If you want to see what others have on their design walls, check out Judy's blog.

Sunday, March 8, 2015

I figured it out

I figured it out. I don't have to sew around each square, I can sew rows together and then have zig-zag seams to sew to add the row to the rest of the top. Note to self: sew the square to the upper left point, starting with the second block from the left. 

This made my life so much easier. I sew the squares onto each block, then the blocks together, then the row to the top. If I ever decide to do another top anything like this, I'll have a clue (I hope) about how to piece it more efficiently.

The colors aren't true, but the blues do get darker as they move down. (What's interesting is the plain green octagon in the middle there is the same green elsewhere around the edges. It's amazing how colors change depending on what they are near.)

Only two more rows after this on is attached, then all the green that goes around the edges.

Yay!

I didn't think this through

I really like the design of this quilt, but I didn't really think through the construction of it. Don't get me wrong, I can do it, but it is a slow process. See the one star complete in the upper left. Well, I didn't think about the process for getting that square in the middle to complete it. When I drew it, well....it was just four lines, and I'd have to sew it to the points. No big deal. However, putting it in there requires partial seams, and I never measured how big it needed to be. 

I put the four squares together like they would be sewn on the cutting table and measured. I then cut out a square and inset it. It just looked wrong. The points of the star didn't match the points of the neighboring stars. Why....oh, the square is too small. But what do I do? The measurement was right, I thought. The seam allowances were messing me up, so I finally ended up constructing paper octagons of the correct size, taping them together and measuring the square hole left. I had made the square 1/2 inch too small. I finally got the right measurement and I'm on my way. 

Here is the back side of what I've completed so far. I've outlined the squares that have to be inset in blue so they are more clear. Once I get them together it grows pretty fast, but it took sewing and un-sewing a lot before I got it right. 

Oh, you might also be wondering (if you noticed) about my clever use of the plain octagons to set off the pieced ones. Why, you ask did I make that design decision. Well...if you stack fabric to cut these octagons, you need 8 layers. The fabric repeat was about 12 1/2" and the strips for the kaleidoscopes was 6 inches I got 12 sets of triangles to sew into octagons from each stacked set. That made 24 blocks. No problem, that's plenty.

Unfortunately I don't seem to be able to count well in the twenties, I needed 26. So, use another 3 yards of fabric for two blocks or...get creative? You can see I decided that it wasn't worth the extra 3 yards. I think I might move the lower plain block to the right one space, but I'm not sure yet. 

In case you're interested, here is how I constructed the octagons. I knew I wanted them to be 11 inches finished, so I drew a circle of 11 inches. Then I folded it in half (just folding across the pencil line at the edge of the circle, I then drew a line between those two marks and did that three more times. I used one of my acrylic rulers and put the edge right at the edge of the circle with one of the perpendicular lines on the drawn line. I drew a line and around you go. It worked really well to get the right size octagon.

Happy quilting and may all your seams match.


Monday, March 2, 2015

More Leaves

I have finally sewn the leaves onto the background and trimmed the background from behind the leaves so it is neater. I used a tiny hemstitch and variegated thread to match each leaf.

When you look up close you can see the stitching, but I don't think it's too distracting. If you click on the picture you'll be able to see what I mean

Now I just have to figure out what I'm going to do for a border to finish this.

Sunday, February 26, 2012

Modern Bargello Top is Done

Well here is it pieced. I took this inside (of course) because I don't have a place to take it without direct sunlight. When the sun goes behind the mountains I'll move it outside and take one. It will be interesting to see the difference in the colors. The proportions aren't quite right. I think I need to make it a bit shorter, or a bit wider. I'll have to look at it more closely...but I really like it.

I'm still debating whether I should add a top and bottom border with squares of color. What do you think? No border, or border? At the moment I'm leaning toward no border. Click on the pictures to enlarge them.

I have no idea how I am going to finish it, but I have faith that I'll figure it out.

It's hard to get a good picture....

especially in the evening when the winds start to shift...

the colors are much better here...

so I waited till the sun was behind the mountains....ta dah!
The colors are much more true in this picture, though the inside photo isn't awful.

Thursday, January 19, 2012

Super Zig-progress

 Here is what it looks like at the moment. All the main blocks are cut, now to cut all of the edge blocks. I don't know if the blocks will stay in this color order, or if I'll move them around some. I'll play a bit and see what I think.

The background fabric in this picture looks like the heather gray of a sweatshirt, but as you can see in the picture below, it really is black on white. If you click the picture to enlarge it, you can see it more clearly.

It should be done pretty darn quick, then there's just the quilting!

And one more arrangement of the colors. I think I might like this one more.

Thursday, July 21, 2011

Stuff

 Here is the main section of the top all put together. I'm going to use the sashing fabric for a narrow inner border, then I have a darker green that I think I'm going to use for the outer border. I was thinking of adding a pieced border, but I think for the blocks to be the focus, I'll just use a plain border as a frame.

Here is a shot with the fabric I'm thinking of using for the outer border. It has stars on it, but I think it will be OK. The color looks fine with the greens in the main fabric, so I'm going to just do it. I'm trying really hard not to buy more fabric (though I did break down and get two pieces a couple of days ago).


One fabric I bought is the one marked above. I've been planning to make this quilt for a while but I still need to buy a couple more darks...I have plenty of mediums and lights. It is from Judy Laquidara's blog and called Peaches and Dreams. I never use oranges, but I love this one, so I'm going to make it.

The gray fabric to the right was the other piece I bought. I decided I wanted a gray to use and first picked up a print. It is a newer fabric so cost about $11 per yard. I then looked at the batiks and saw this one. It was only $9 per yard...probably because it has been around a bit longer.

 I somehow followed an internet trail from Judy's Design Wall Monday and saw a quilt called Jack's Chain . I have never seen this pattern before, but I'm intrigued. I'm going to use the solids shown and the gray for the background. Don't know when I'm going to start, but I'm liking the idea. I don't know how I'm going to distribute the colors yet, but I'll think of something.

Monday, August 24, 2009

What's on my Design Wall...With Borders


Here it is with borders. The right and left are sewn on, the top and bottom not. I like it. What a happy quilt. Don't know who it's for yet, but I like it.

Check out other folks design walls on Judy's website.

bluesignaturesmall

Monday, August 17, 2009

What's on My Design Wall 8-17

This is going to be a "kilt" from Hawaiian fabric. It's not there yet, but I hope to have it done before we go to the highland games in a couple of weeks.
This is fabric I bought in Bend last year when I went to the Sisters quilt show. This was a 5 yard bundle, and it took a long time to figure out what to do with it. I'm going to use the Jelly Beans from quickquilts.com

It's not going to look anything like the picture online (though I like that one a lot) but I think I will like it well enough. I'm making it bigger than the online version. I need to find border fabric (don't have enough of anything left to use as a border), but I think I'll be able to, and maybe even from my stash.

Check out other folks' design walls on Judy's website.

bluesignaturesmall

Wednesday, July 8, 2009

Totally Tubular Quilt

Here us the quilt I am working on...

from this book...
...with these fabrics.

Unfortunately I worked about 4 hours yesterday and pinned every intersection...wrong. See the strip set in the center. The line of black and white squares go from upper left to lower right? That is the correct direction. See the strip set in the lower left...those go from upper right to lower left...that's the wrong direction. I only sewed one set correctly, and the rest, all wrong. So I have to un-sew every seam that I pinned so very carefully. I think this one is being put away for a while. I even took out one seam yesterday, and sewed it back, and that was wrong too. I'm only supposed to have 6 strips per set, and that one I have 8 strips. Guess I wasn't too focused.

Well, back to the old drawing board!


bluesignaturesmall

Wednesday, April 8, 2009

Spring...to finish

I visited Tallgrass Prarie Studio and saw that she is going to work on finishing some WIP before the end of April. I certainly have some to finish--so I put the button on my blog. I have (lookingn around the room):
  • the oriental tiles quilt that needs binding and some more flowers quilted
  • the second aloha shirt for my hubby
  • the spin cycle quilt top I just finished needs to be quilted
  • the hydrangea 4-path top I just finished needs to be quilted
  • the other aloha shirt that's been waiting since before Christmas
  • pillowcase bags
Of those, I am going to finish the oriental tiles, the shirts and the pillowcase bags. I'm going to try to sandwich and pin either the spin cycle or the hydrangea 4-patch. If I get those things done I will be a happy camper


bluesignaturesmall

LinkWithin

Related Posts Plugin for WordPress, Blogger...