Showing posts with label WIP. Show all posts

Monday, August 17, 2015

More quilting Going On

After the dense quilting on the last quilt that took FOREVER, I decided to do something easy and fast for the next quilt. I was trying to figure out something clever that would fit in the hourglass shapes (tumbler blocks stacked on each other) and then came across the puzzle block quilting pattern. I didn't draw any lines so it's not perfect, but it works for me on this quilt. I just sewed all the lines the length of the quilt, and now I'm working on the crosswise lines. Simple but effective.


The backing is from Ikea; fabric I bought a couple of years ago at least. I'm actually almost done and I started yesterday. YAY.

I finished the top 4 1/2 years ago, yikes. I had no idea it had been that long. It's a pattern I downloaded (free at the time) from Elizabeth Hartman called New Wave. It can be purchased from her website now. If you're interested you can find it here.

I have no specific recipient in mind, but there are always babies, right?

I'm linking up to Blossom Heart Quilts and Freemotion by the River, go check them out.

Thursday, June 18, 2015

Almost There, and Some Advice

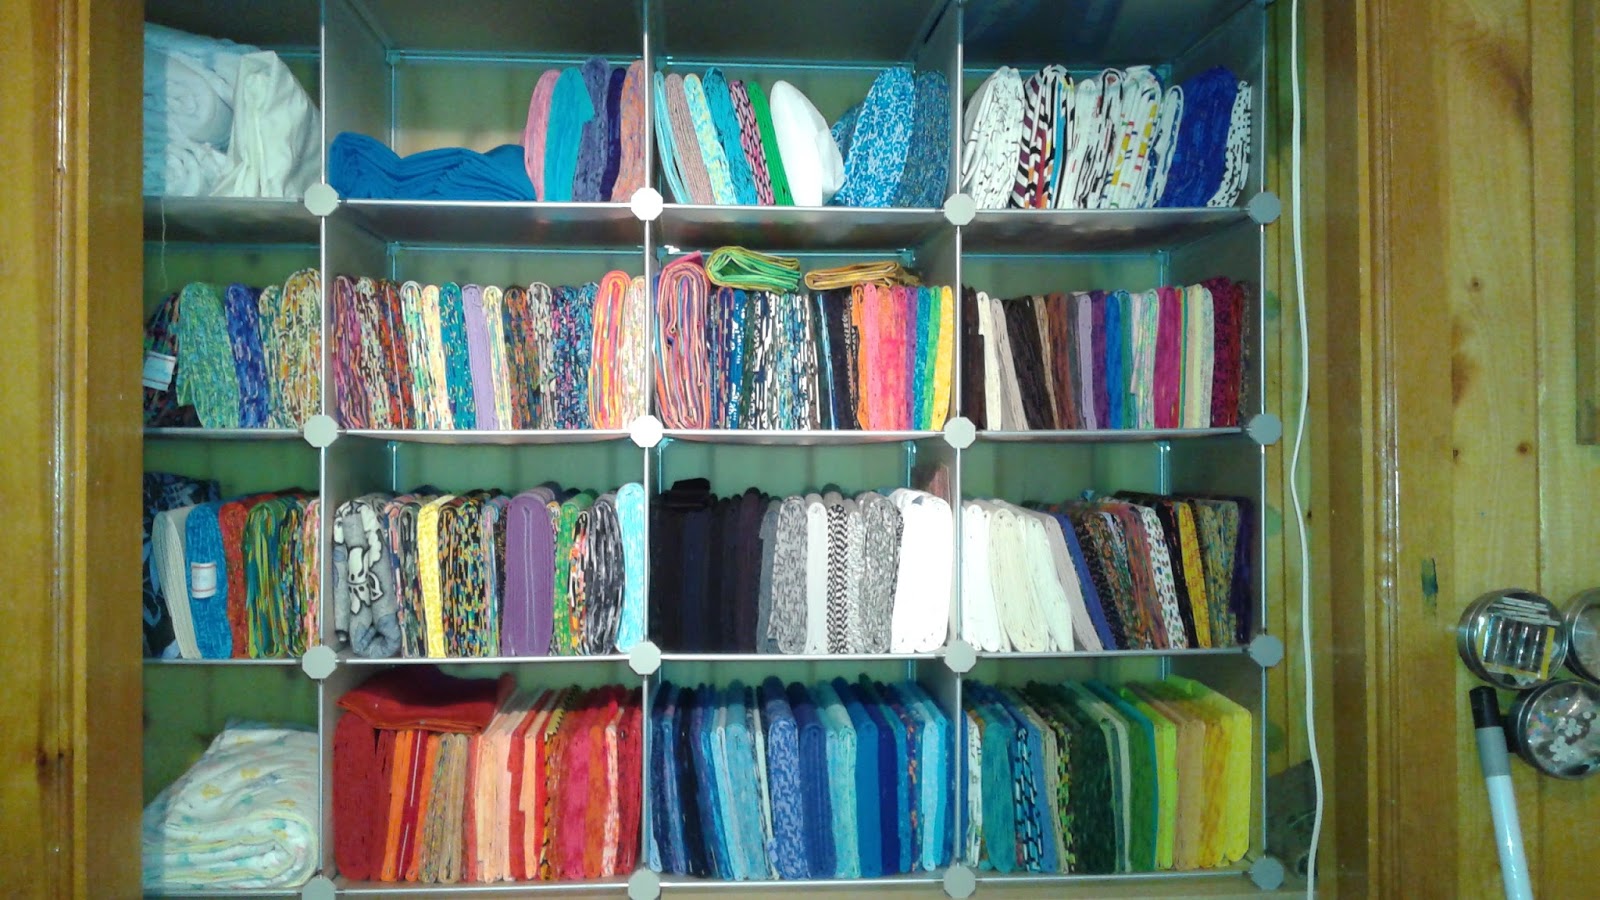
Here is the fabric closet now. I took this last night, then found more fabric (surprise) that needed to be wound into mini-bolts. I have to let you know, I have bought and lost solid black fabric a couple of times, but good news, now it's found!. One piece was about 8 yards (what for you ask, I have no idea!) The last one I found was only about 3 yards. I have plenty of black fabric. Good thing I like to use it.

And now for some advice. The last time I  organized I put things away so that they would be organized. The little set of drawers you see has a sister; both of them filled with delightful items I would keep together to work on any day now. I then put the two of them very safely in the closet in their own little space on the floor in the corner.

Yesterday, they were brought back into the light. I found the wonderful treasures I had stored. I guess I wanted a time capsule, not an easily accessible storage place. So my advice, put things where you can get to them easily and where you can see them, unless of course you are constructing a time capsule.

I must have been because I also unearthed this kit. I looked at it and couldn't figure out where or when I got it.
Then I looked at the tag. I bought this when I went with my sister to the Sister's Quilt show in, wait for it....2008. So the time capsule worked, it has reminded me of events and wonderful times from long ago!

Update: I found this. The closet just outside my sewing room. I knew there was fabric in it, I'm the one who put it there. However I think my mind has been ignoring it.

The large bin toward the top has fleece for backings, so that one goes back. The small one on top is completed quilts, so they get moved. The bottom one has clothing fabric and patterns. You'll be surprised to hear that I have aged it long enough, and it is ready to be shared (with a charity shop), at least most of it.

I think I should stop looking. I'm tired of fabric! I don't want to organize anymore. I want to quilt.

Oh one more! These blocks were in one of the time capsules drawers. I remember that I didn't like them when I finished them. Now they're OK, I guess absence does make the heart grow fonder. I have fleece for the backing, so quick baby quilt. You'll be surprised to know there are babies going to be born in my world.

Onward and upward. Back to work.

Friday, June 12, 2015

Squirrel(s)

 Because, as my sister said last night, I see a lot of squirrels while doing some long term projects I have to replace this one ugly section of fabric. I have been meaning to do it for a while, but I guess I just didn't need the distraction enough till now. These fabrics are all dragonflies I've collected. I put in the orangey-red one and I just HATE it.
So finally I am going to replace it with the blue you see here. (sorry for the crappy pictures, my husband is using my camera so I'm using my phone.) I don't LOVE this quilt, but it's OK. I might like it better once it is done and quilted. Maybe this will be the first one I quilt with the Bailey's Home Quilter I got.


And I'm done. I replaced the whole zig-zag row. I feel MUCH better now.

Whew.

Wednesday, June 3, 2015

Finishing up

I got my Bernina back from being serviced. Nice and smooth and quiet. I was able to quilt the last two octagons on this quilt. Now I just need to figure out what to do with the outside border area. I don't want to make it too fancy but it also needs to match the density in the interior of the quilt.

I also want to work on the hexagon maze. I only have these two blocks done, but this is going to be one of those quilts that will be done all at once because of the nature of the pattern. Each hexagon needs rounds of fabric, then they can be sewed together....lots of rounds of fabric. I have the grey done on all 25 except for one piece on each. I got sidetracked yesterday because the Bernina came back and I needed to finish the quilting that got interrupted.

I'm supposed to get my new quilting machine today. Here is a picture from the shop. It is from Bailey's Sewing in New York state and will certainly be easier to use with the large harp space. I'm pretty excited to see how it will work for me.

The finished quilt will be about 70 x 100, so will work for the guest room (I think). I just design and make them I don't plan them :-).

So much going on, but I'm having fun.

I'm linking to Lee at Freshly Pieced Modern today. Check out what others have in progress there.

Monday, June 1, 2015

New--Hexagon Maze

 here are two of the blocks for the new quilt. The pattern is the one shown below. I'm making it up as I go along, which means sometimes I cut pieces that don't fit because I don't measure well...oh well.

I like the pattern. It is going to be a bit complex to piece, but I don't seem to be able to design easy patterns. It took me a bit to figure out how to add that little vertical bit of fabric at the bottom of the block. I decided the easiest way was to top stitch down the sides. I unpicked a bit of the sewing between the grey and blue borders, stuck the bit of blue in and top-stitched. I like it.

The process is slow. I have 25 hexagons and each one has to have at least two rounds of fabric sewed on. I only have These two completed. The other 23 have just 6 of the 6 pieces needed for the first "round" of grey.

I am currently using my Featherweight because my Bernina was making horrible screeching noises. I guess after more than 25 years it needed professional care. I took it in to be tuned up last Tuesday so I should have it back soon.

The Featherweight is doing a great job (after I figured out how to put the bobbin in correctly) but it is a bit slow. It also seems I have to replace the bobbin a lot!

I'm linking up to Judy at Patchwork Times.

Thursday, April 30, 2015

Progress

It doesn't look significantly different, but the four columns on the left are now sewn together. I found a tutorial online that reminded me the easy way to sew hexagons together like this. You sew opposing triangles onto the hexagon to make a diamond, then sew the diamonds together on the diagonal. It actually goes together pretty quickly. I don't know what I am going to do about the border on the top and bottom yet, or what color I'm going to use there.

I'm having fun now that I finally figured out how to put it together so I like it.

Tuesday, October 16, 2012

Alphabet Blocks Idea

What do you think of the tumbling blocks in the corners? I think they might be fun. I've got all the letters done and I like them. It was fun to go through my scraps and choose colors that I thought would work. I like these letter shapes much better than the previous ones. The only one I'm not too happy with is the Y, I may have to redesign that and make another one. The H is a little spindly, and maybe there should have been holes in the B, and maybe the A.

Putting the letters together was a bit like a puzzle, and I may have at least one or two more quilts in me yet.

Monday, October 15, 2012

Design Wall October 15, 2012


Here is what is on the design wall at the moment. I finished the first alphabet quilt and decided to do at least one more, but with a few modifications to the shapes of the letters. I used graph paper to draw them out, and am being a bit more intentional about the shapes and colors I am using.


Here is the plan with the altered letters. I found some free graph paper online and printed out 8 squares to the inch, because I'm making 8 inch squares, then I just count the squares to know how big to make the pieces. It makes it much easier.

Here is the finished top. I like the way this one came out too, and now I just need to quilt it. I think I'll probably use gray thread for the quilting, though I may end up using matching or complementary colors for quilting the letters. I planned to use a fleece back, but perhaps I'll change that to flannel, much more baby friendly.

To see more design walls, check out Judy's blog.

Sunday, October 14, 2012

And Another One

I had such fun with the last one, I decided to make one more of the three baby quilts with the alphabet. I modified it a bit this time, and am actually going to make it more or less look like this, I started and have already made 10 letters. I want to follow the colors I used on the plan this time, and make them more to plan.

I like the colors so far. I decided to use prints this time, but monochromatic so that they look almost like solids.I also decided to use white as the background, even though it's a baby quilt. I guess the recipient can worry about keeping it clean! I plan to make it machine washable, so that should make it a bit easier.


Sunday, September 30, 2012

Design Wall Monday, 1 October 2012

See what I did! This is the first successful paper pieced thing I've ever made...and I like it. I finally bit the bullet and followed some instructions. Make the cut pieces 3/4" larger than needed. Follow Carol Doak's TSP and baste the pieced together first. I don't love paper piecing and I'll never make a whole quilt that's paper pieced, but for the special project I'll be willing.

It's not perfect but I did it. I'm going to make a tote for my Featherweight so I can take it to Austin in February. It's not quite finished. It needs the needle bit and the spool bits near the bobbin (the blue square above the R is thread). I got the pattern here. It's a free download and I like it a lot. The color of the block isn't right in this photo, but it's close. I was looking for a wallhanging to make, when I came across this pattern and decided to give it a whirl.

Since the retreat I've been pretty productive. I got the Peach Melba top pieced...still needs borders. According to the pattern, 8 borders, but I don't think I'm going to make that many :^). I think I'll settle for just 3 or 4. I'm thinking a thin  light border, then a thicker dark and maybe a final one...I don't know what color. It's currently about 60 x 72.
Then I finished this jelly roll top. I had this ready to go for the retreat but my machine was acting up so I didn't get it done. I sewed this Friday in between coughing, sleeping and drinking lots of water.(I have a nasty respiratory thing--a bit more than a cold because I have gunk in my lungs--so I stayed home on Friday.) I need to add some more to it to make it useful, but I did make a jelly roll calculator to figure how many and what width needed for any size top. I did that Monday before the cold hit. I blogged about it here.

To see more design walls, check out Judy's blog.

Wednesday, September 26, 2012

Peach Melba Layout

I think this is the layout I'm going with. There is only so much moving around I can do. There isn't anything that looks too much like a clump. Now to sew it all together.

Sandie suggested the name. I've never tasted or seen peach Melba, so I did a Google image search and found this photo. There are a lot of similar colors so peach Melba it is. Keep the peach in from Judy's title and add the twist.


Friday, July 20, 2012

Progress-and Design Wall

I made one more hexagon, so four full hexagons left, then half and quarter ones. They are supposed to have the middle hexagon appliqued on, but I decided to piece them. I sew the hexagon sides to the center all around, then sew the seams between the sides. Not hard, but a bit fussy.

To see more design walls check out Judy's blog.


Now the big project that's done...from this...

...to this!

I don't know if the cat is going to enjoy it right away, but I think she will eventually. She is still a little tentative, so it might take her a bit. We don't have it attached to the ceiling beam yet, and I don't know if we'll need to. She only weighs about 10 pounds so it probably won't wobble. It is 8 feet tall and 24 inches in diameter. the circles are 16 inches (pre-cut and available at Lowes). I still have to adjust the top "room". It's a bit too close to the one below so she can't quite get in there, but I only screwed it into the three poles, so it won't be a problem.

I ended up doing most of the work myself. Joe was gone all week at a retreat, so other than covering the poles, I did everything else. I got a couple of nicks and scratches, and my back hurts some, but I feel good about the whole thing.

Yay me!

Wednesday, July 18, 2012

Back to it

I'm finally back to getting stuff done, working on the cat tree and a new top (not that I need another top, but it's fun...we do need the cat tree though, new cat.)

We got Maggie a bit over a week ago. She is a very sweet cat. We've been without a cat for almost three years and we decided it was time. She is a talker, it is quite funny to me because Buddy almost never made noise. She plays around with the mouse we got, tossing, batting and chasing it and meows the whole time. She also chases her tail, I've never seen a cat do that before. I bought a scratching post, but she hasn't used it. I caught her scratching at the couch and one of the chairs, so a tree it is.  
It's based on this tree, but will have shelters at the top and bottom of the tree. It will also reach to the beams in our living room so if she wants she can walk across the beams. I have no idea if she'll use it, but I certainly hope so. Maybe I'll buy some catnip to get her interested. I have all the parts cut and ready to glue and cover, then screw together. I hope I get it done soon. 

I'm also working on Amy Butler's Sexy Hexy Love quilt. It' a free pattern if you're interested you can find it on this page (about the middle of the page). 

I chose all blues. I had them picked out for a different top that I decided not to make so they were waiting to be used for something. Instead of putting them away, I just decided to use them for this quilt. I've finished a couple of the hexagons. They're pretty big so the quilt only takes 7 full hexagons, 4 half hexagons and 6 quarter hexagons and then it's done. I cut out all the pieces then stacked the fabrics together that I thought might work.

Well got to get to work on the cat tree. I can never work on just one thing at a time

Sunday, February 26, 2012

Modern Bargello Top is Done

Well here is it pieced. I took this inside (of course) because I don't have a place to take it without direct sunlight. When the sun goes behind the mountains I'll move it outside and take one. It will be interesting to see the difference in the colors. The proportions aren't quite right. I think I need to make it a bit shorter, or a bit wider. I'll have to look at it more closely...but I really like it.

I'm still debating whether I should add a top and bottom border with squares of color. What do you think? No border, or border? At the moment I'm leaning toward no border. Click on the pictures to enlarge them.

I have no idea how I am going to finish it, but I have faith that I'll figure it out.

It's hard to get a good picture....

especially in the evening when the winds start to shift...

the colors are much better here...

so I waited till the sun was behind the mountains....ta dah!
The colors are much more true in this picture, though the inside photo isn't awful.

Thursday, January 19, 2012

Super Zig-progress

 Here is what it looks like at the moment. All the main blocks are cut, now to cut all of the edge blocks. I don't know if the blocks will stay in this color order, or if I'll move them around some. I'll play a bit and see what I think.

The background fabric in this picture looks like the heather gray of a sweatshirt, but as you can see in the picture below, it really is black on white. If you click the picture to enlarge it, you can see it more clearly.

It should be done pretty darn quick, then there's just the quilting!

And one more arrangement of the colors. I think I might like this one more.

Thursday, July 21, 2011

Stuff

 Here is the main section of the top all put together. I'm going to use the sashing fabric for a narrow inner border, then I have a darker green that I think I'm going to use for the outer border. I was thinking of adding a pieced border, but I think for the blocks to be the focus, I'll just use a plain border as a frame.

Here is a shot with the fabric I'm thinking of using for the outer border. It has stars on it, but I think it will be OK. The color looks fine with the greens in the main fabric, so I'm going to just do it. I'm trying really hard not to buy more fabric (though I did break down and get two pieces a couple of days ago).


One fabric I bought is the one marked above. I've been planning to make this quilt for a while but I still need to buy a couple more darks...I have plenty of mediums and lights. It is from Judy Laquidara's blog and called Peaches and Dreams. I never use oranges, but I love this one, so I'm going to make it.

The gray fabric to the right was the other piece I bought. I decided I wanted a gray to use and first picked up a print. It is a newer fabric so cost about $11 per yard. I then looked at the batiks and saw this one. It was only $9 per yard...probably because it has been around a bit longer.

 I somehow followed an internet trail from Judy's Design Wall Monday and saw a quilt called Jack's Chain . I have never seen this pattern before, but I'm intrigued. I'm going to use the solids shown and the gray for the background. Don't know when I'm going to start, but I'm liking the idea. I don't know how I'm going to distribute the colors yet, but I'll think of something.

Friday, September 4, 2009

Mystery Quilt--What Knots?


Well, here's the top. I like it. I even have the backing already-a light brown-very nice.


bluesignaturesmall

Monday, August 24, 2009

What's on my Design Wall...With Borders


Here it is with borders. The right and left are sewn on, the top and bottom not. I like it. What a happy quilt. Don't know who it's for yet, but I like it.

Check out other folks design walls on Judy's website.

bluesignaturesmall

LinkWithin

Related Posts Plugin for WordPress, Blogger...